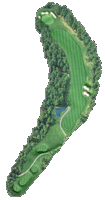
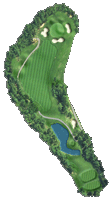
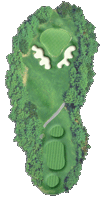
Hole Overviews

#1 Par 5 • 560 yds
Hit your tee shot long, with a slight fade safely away from the water hazard on the left. From the middle of the fairway, the second shot, with the help of any leftover confidence is as smooth as silk. Two putts and mark the card an easy par every time.

#2 Par 4 • 335 yds
A straight iron shot from the tee will stay in play nicely, leaving no more than 130 yards into the green. Keep your head down, think happy thoughts, and replace your divots. Because from the middle of the green it will be a flat putt for a simple par.

#3 Par 4/5 • 465 yds
Unless the driver is the straightest club in your bag, hit a nice, straight three wood to the top of the hill in the middle of the fairway. Roll up onto the green from 200+ yards away and stay clear of the river on the right.

#4 Par 4 • 423 yds
Off the tee make sure the ball doesn’t sail right toward the pond on number 5. A decent drive leaves you no more than 180 yards to the center of the green. A pin located directly behind the front left bunker can be very difficult to get near.

#5 Par 3 • 201 yds
Split the bunkers and shoot for the center of the green. Play it safe and keep your reputation unblemished by making par on this simple hole. Three is better than four any day; except in bowling.

#6 Par 4 • 381 yds
Known to be one of the toughest holes on the course! Aim your drive to the right side of the fairway which will leave you about 150 yards away from this elevated green. Take an extra club on your approach to make sure you reach!

#7 Par 4 • 308 yds
Hit your tee shot deep and straight, leaving no more than a sand wedge to the green. The more loft on the second shot the better. Go easy with your putting stroke.

#8 Par 3 • 194 yds
Overlook’s Signature Hole! Always select at least one club less than what you would normally hit based on the yardage markers. Stay away from the bunkers on the left. The Local’s Secret: The hill on the right side of the green usually supplies a nice kick back onto the putting surface.

#9 Par 4 • 346 yds
Your drive needs to be in the fairway, placed just to the right of the fairway bunker. A decent drive leaves no more than 145 yards to the center of the green. Fix your ball mark, take two putts, and proceed to the clubhouse for a quick bite to eat.

#10 Par 5 • 549 yds
Long hitters may reach in two with a well-positioned drive down the right side just to the left of the fairway bunker. The water on the right side is not reachable from the tee.

#11 Par 4 • 376 yds
A pond guards the left side of this dogleg left, so stay to the right. On your approach shot, note that the river borders the rear of the green.

#12 Par 4 • 366 yds
Challenge this dogleg right by hitting your tee shot along the trees leaving a short chip to the green.

#13 Par 4 • 422 yds
This is a long par four with a slight dog leg right, avoid the pond to the right. A long drive will reach the bunker on the left.

#14 Par 3 • 198 yds
Hitting to this undulating green try to play to the tier where the pin is located. Bunkers on each side of this green provide added protection.

#15 Par 4 • 368 yds
The river runs down the right side of this dogleg left while woods line the left side. Note the pond in front of the green!

#16 Par 4 • 341 yds
Aim your tee shot to the center of the fairway. The bunker on the left of this dogleg is reachable from the tee.

#17 Par 3 • 160 yds
On this short par three, get up and go for the green. The layout favors a confident swing, ensuring the ball lands safely on the green to set up a potential birdie or secure par.

#18 Par 5 • 546 yds
With the river on the left, this par five requires an accurate tee shot. The pond that sits about 105 yards from the green forces you to choose; lay up your approach shot or carry the water. Good Luck!
